
Seed sovereignty -2
FREE THE SEED! (part TWO)
A beginner’s guide to your first season of seed saving

This is part two of a piece on Seed Saving that discusses the practice of seed-saving as a small but first-hand experience of stepping toward “sovereignty” - by meeting your need-for-seed autonomously, and by strengthening our capacity to imagine life-affirming futures. Read part one here. Now for this promised “how-to” guide.
First things first, what is seed saving? Saving seed is the act of harvesting and storing seeds to use in the future. Simple! So, how to go about it?
Like most “simple” practices, there are dozens of complex processes to consider, dive in deep and gain expertise when it comes to seed saving. From the smallest scale (How is this flower pollinated?) to international scales (European seed legislation), seed-saving can be as simple or as involved as you want it to be. It’s easy to drown in details in an age when so much information is available. But at its heart, seed saving is simply harvesting and storing seed to share and use in the future. Seed-saving from your own garden or balcony makes it possible to get first-hand experience in meeting our need for seed autonomously. And while most of us won’t go on to start a local seed bank or change European legislation on seed (never say never!), this act waters our capacity for imagining and strengthening a sovereign and thriving local food web. Every seed counts!
To get started, I suggest choosing one or two plants to save seed from. It would make the most sense if these are plants you can grow in a garden, balcony, window-sill or wherever else you grow, so you can see the process through the growing season. Once you’ve chosen your plants, there are a few things to keep in mind on the way. These “sign-posts” are moments in the season that orient your seed saving path.
Spring
At the time of writing, it’s spring. Some plants - carrots, beans, onions, some leafy greens - have already been sown in the open ground and some - tomatoes, courgettes, sunflowers - are getting a head-start indoors.
The energy of spring is curious and invites us to dream about and research the year ahead. Start thinking about what seeds you would like to save this year. On my 8m² balcony garden, I’m going to try saving fava beans (vicia faba) and carrot (milan) seeds.
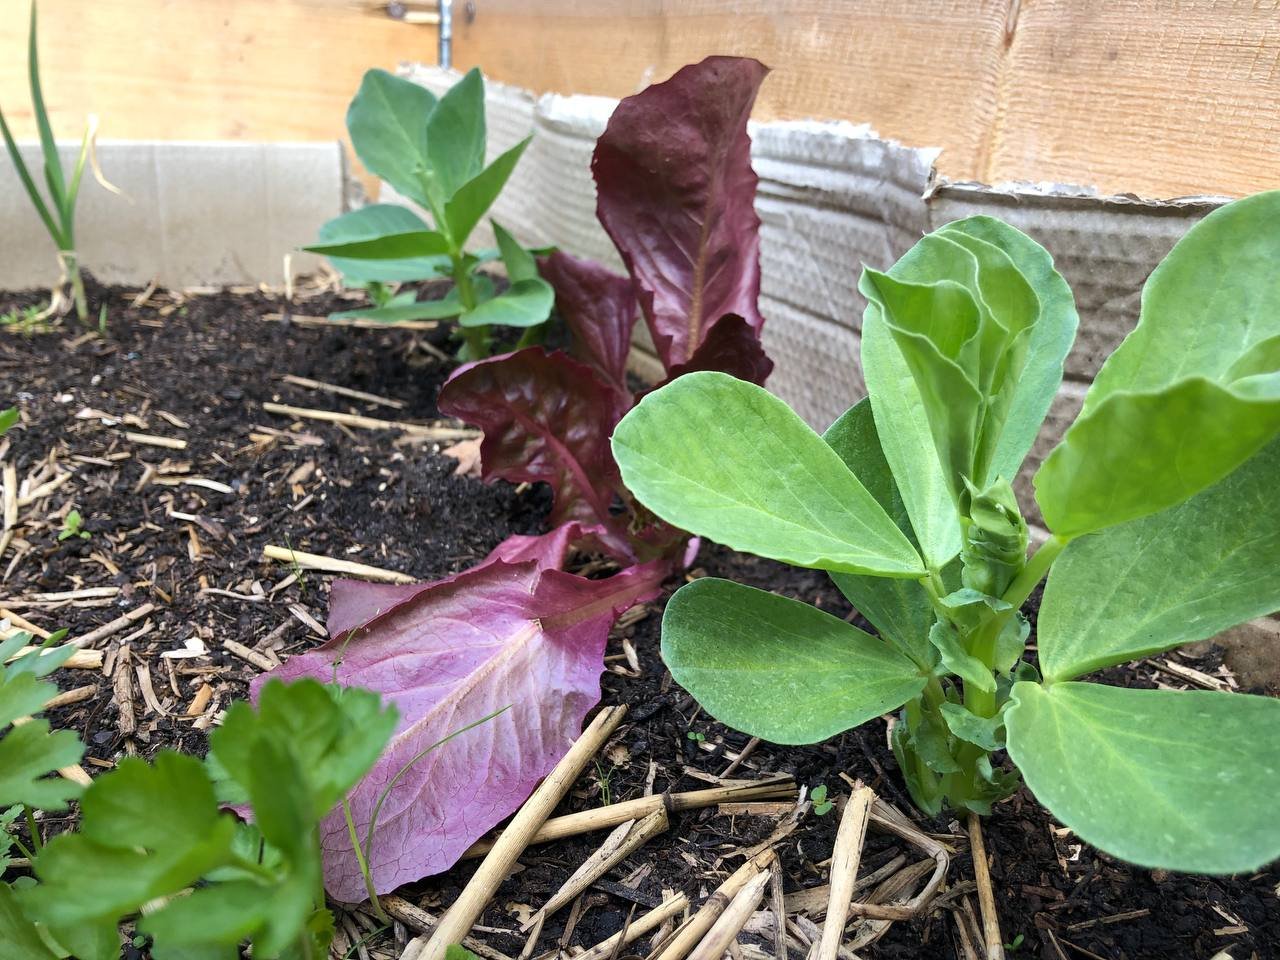
Carrot sprouts and fava beans in my balcony planter, intercropped with lettuce and a chinese leaves mixture
1. Choosing your seed
What seeds you want to save can be based on what you like to eat, preserving varieties or heirloom seeds that are no longer commercially available, climate considerations, and any other reason.
I’m choosing fava beans because I know I want to sow them next year. All beans are a fun and friendly choice for a seed saving beginner. And carrots, because the first time I saw a carrot in second-year growth, I barely recognised it. In their second year, carrot greens grow massive and bloom with beautiful, lacy, white umbel-type flowers. The dried seed-heads are gorgeous, too, and produce a huge amount of seed.

Carrot flowers. Image credit: Nikki Son @areumdown
2. Get to know your plant
Is it an annual, biannual or perennial plant?
Carrots only go to seed in the second year, so don’t be surprised if there are no carrot seeds in sight at the end of the season. You actually need to leave some carrots in the ground, and let them blot in the second year. In colder climates, you’ll “harvest” your carrots in autumn, choose your finest carrots for seed and store these to be replanted once the threat of frost is past in spring of the next year. A seed stalk will emerge and the flower umbels will unfurl by early summer.
How is it pollinated?
Most beans are predominantly self-pollinating. Some bean flowers are even pollinated before the flower bud opens. That means I can focus on healthy soil and healthy plants and forget about the rest. Carrots, on the other hand, are cross-pollinated by insects, which might be tough on my third-floor balcony where only the very brave or very confused venture.
Knowing what type of pollination your plant needs will help determine whether you need to intervene at some point in the pollination process. This may involve acting like an insect yourself if there are none, or planting many pollinator friendly companion plants to attract them. I know many gardeners who hand-pollinate corn and cucurbits. Moreover, a single brassica plant (be it cabbage, cauliflower or kohlrabi) will produce very little seed on its own, because of a chemical barrier that prevents cross-pollination from the same flower; it’s a good idea to grow multiple plants to produce a robust amount of viable seed. If multiple varieties bloom at the same time, you may also have to isolate your plant and/or its flowers. There are specific buffer zones recommended for different species, so research those before saving seeds from certain types of vegetables that are insect and wind pollinated, even those that are predominantly self pollinating.
All these options and specificities may seem a bit overwhelming, but don’t worry about the many and mysterious ways different plants make babies; focus on the plant(s) you’ve chosen!
What seeds you started with…
An important part of seed saving is actually knowing what seeds you started with! This is a deep dive in itself - here’s Cityplotter Giuila’s beginners guide to selecting seed for your garden.
3. Planning your seed saving garden
Now that you’ve selected your plants and gathered some important information, it’s time to integrate this into your garden plan. The main considerations are space and time. Letting plants to go seed often means leaving them in the ground for longer, and letting them get quite a lot bigger than when they’re grown for a harvest. Leave enough space for plants to go to seed and consider that this might interrupt your plans for a second crop later in the season. You won’t necessarily know ahead of time where the plants you choose to leave for seed will be (in a whole row of carrots, I’ll only leave two or three), so allow yourself to be a little bit flexible with planning. That being said, remember that you’re receiving an additional yield that puts the future of your garden (and my carrots!) in your own hands.
The number of plants you will need to yield a decent amount of robust seed will also vary, based primarily on pollination type and preserving genetic diversity. Because beans self-pollinate, I could easily grow one bean plant and mark the finest pods for saving. However, if I continue like this year after year, I create a weakness in the variety or what is officially called “inbreeding depression”. Moreover, fava beans can also cross pollinate, so it would be best to sow only one variety if you are seed saving. This guideline would apply to most vegetables that you are planning to save seeds from. Integrating genetic diversity in our seed saving, by growing and saving seed from multiple plants, is a direct intervention to preserve and increase genetic diversity in our gardens, farms and kitchens. A key to creating resilient food systems and people!
Again, in the beginning, research one or two plants for saving seed. This is so much easier than if you’re planning to save seed from every plant in your garden!
Summer
By summertime, our gardens are lush and thriving, and beginning to yield fruit. The energy of this season is vitalising and encourages growth. As well as enjoying the sunshine and colours of summer, it’s also time to start considering the next stages of the seed-saving!
1. Selection
Once the plants are growing, select plants from which you want to collect seed; mark these plants with a bright ribbon to remind yourself and others not to harvest. Like other aspects of seed saving, criteria for selection can also be as simple or involved as you wish.
It’s important to keep the overall health of the plant in mind; plants that are disease free and grow vigorously are your go-to. Keep an eye out for plants that survived bad-weather surprisingly well, or are free from insect attacks when other plants are suffering. Experienced seed-savers often encourage roguing which means removing plants with undesired characteristics before flowering, removing their pollen from the gene-pool. Remember that the seed you choose to save impacts later generations. Choose seeds based on particular qualities that you want to encourage or discourage in future generations; you can select for early or late fruit or a survivor of drought, you can also select for sweetness, size, etc., but also keep in mind that saving the the first seed that your lettuce produces may encourage early seeders in the next generation. Marking plants and clearly labeling for your choices is a very good call at this stage.
2. When to collect?
Pumpkin seeds are ready when the fruit is ripe and you would be harvesting it anyway. Zucchinis and cucumbers are usually harvested immature, and need to be left to ripen on the plant past their ideal harvest time. Beans want to be left on the plant to dry. My fava beans, already growing now in mid-april, will be ready to harvest by early summer. The best pods to save are the first, which grow closer to the ground and are slightly bigger than the rest. I would mark these not to harvest, and let them dry on the plant, ready to collect in late summer.
3. Processing
There are three main methods of processing seed: dry seed, wet seed & fermenting seed. Which method you choose depends on what seed you are trying to save. Some seeds are definitely easier than others, so start simple, every seed counts!
Dry seed processing: grains, lettuce, brassicas, onions, beets, carrots, celery, cilantro, and chicories, beans, lots more!
This is often the simplest form of seed saving. Harvest the seed stalk from a plant that looks beautiful and healthy, either once already dry or while fresh, and set to dry indoors. Some seeds need to be threshed and winnowed (to separate the seed from the stalk and chaff, and remove the chaff from the seed) but some seed simply need to be collected once dry. As stated above, beans can be allowed to dry in the pod, harvested and simply collected.
Wet seed processing: melons, peppers, eggplant, squash, garden fruits.
Wet seed processing involves removing the seed from the fruit, rinsing clean of debris, and then drying. A jar of water can be used to separate seed from debris -- seeds sink and debris usually floats. Drying the seed quickly and completely after wet processing is very important.
Fermentation seed processing: tomato, cucumber,
Fermentation is necessary for seeds that have germination inhibitors (usually in the seed coat). Remove the seed from the fruit, some pulp/juice is fine. Put the seed into some water and ferment them for a day or few. The fermentation process breaks down germination inhibitors in the gel-sack that surrounds the seed. If a layer of mold has formed on top of the water, that’s totally normal. Watch the seeds carefully: when the viable seeds sink & their gel-sack disappears, then the fermentation is complete. After all of the pulp, bad seeds, and mold is removed, drain the water from the seeds and set them out on a plate or paper towel to dry. Once the seeds are thoroughly dry, place them in a moisture-proof container, label and store them for the future.
Autumn
When autumn arrives, there’s usually still an abundance of yield and nourishment coming from the garden. Some “summer” steps will apply for autumn too, depending on your seed. But as the year matures and the nights begin to chill, the energy of the autumn invites us to slow down and begin reflecting. When it comes to your process of seed saving, it’s also a good time to
think about storage, your learnings and getting to know your plant even better.
1. Storage
Storing seeds well is super important to maintain their viability. Most flower and vegetable seeds can be kept for up to three to five years but you may want to find out how long you can expect your seed to remain fertile as this varies between plants. In terms of storage, most seeds want to be stored in a dark, dry, air-tight space where the temperature is cool and kept consistent. Clean, dried seed should be stored in airtight containers such as glass jars with airtight lids. For small quantities of seeds, you can place each variety in a paper envelope and put several envelopes in an airtight jar. Some seeds are well kept in the fridge.
2. Learnings
It’s completely up to you how you organise your mini-seed bank. It may be worth keeping a log on why you chose this seed, when it was harvested and where it came from, as this information will be super useful next year.
This time of year is also a wonderful time to reflect on the process and see what you learnt. It may also be a time to dive even more deeply into the many and varied uses and yields of your plant, because you have now made it possible to grow it again next year! After last year, I’ve learnt that the flowers from my fava-beans can be used as a tea that’s especially good for migraines…something to try this time round!
3. Seed Exchange
Seeds are designed to be shared - be it by the wind or the birds, or between you and your neighbours. Saving your own seed often means you end up with way more seed than you can use. Exchanging seeds with other gardeners or farmers in your area often involves exchanging stories, growing practices, experiences, and recipes. Seed saving and exchange makes gardeners, farmers and communities less dependent on for-profit seed and agro-corporations. Seeds are a shared commons, not a commodity…find out about local seed-exchanges (like Reclaim the Seeds and the seed library at the MoTuin) or simply show up to social gatherings with seeds in your pocket!

Myself and cityplotters Sameena and Eva, making recycled seed paper at MoTuin on Tugelaweg 85, together with other volunteers.
So that’s it. Some basic, seasonal sign-posts to orient your seed-saving journey. This is by no means comprehensive, but offers some key moments to keep in mind and orient for deeper research, which I suggest you do with a specific plant in mind. For further reading, and the main source of inspiration for this text, I recommend the Seed Savers Handbook by Michel and Jude Fanton, founders of The Seed Savers’ Network. This book is from 1993 and is written for the Australian context, but offers so much guidance and is full of experienced-based-wisdom from seasoned seed-savers.
I suggest that everyone who grows an edible garden experience a season of seed saving. It’s a small but profound way to build more sovereign growing practices and makes imagining food sovereignty in your locality a little bit more tangible.

Seed paper! Do you want to learn how? Let us know in the comments.

by Kalliope Bournia
“I've been learning, working and growing through Permaculture and Somatic practices for most of my adult life and hope to continue doing so for the rest of it!”